Overview
This post reflects and records on my experience of creating and tattooing a mandala tattoo, utilising the application ‘Amaziograph’ and software ‘Adobe Photoshop’. This piece of writing aims in part to document one aspect of how technological advancements have affected tattooing practice, and to elucidate on the process of cultural production of tattooing - drawing parallels between theory and methods from more conventional creative mediums. In addition, the purpose of this writing is to contextualise the notion of the multifaceted role of the tattooist, from the perspective of the practitioner/researcher.
This post reflects and records on my experience of creating and tattooing a mandala tattoo, utilising the application ‘Amaziograph’ and software ‘Adobe Photoshop’. This piece of writing aims in part to document one aspect of how technological advancements have affected tattooing practice, and to elucidate on the process of cultural production of tattooing - drawing parallels between theory and methods from more conventional creative mediums. In addition, the purpose of this writing is to contextualise the notion of the multifaceted role of the tattooist, from the perspective of the practitioner/researcher.
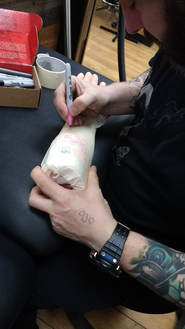
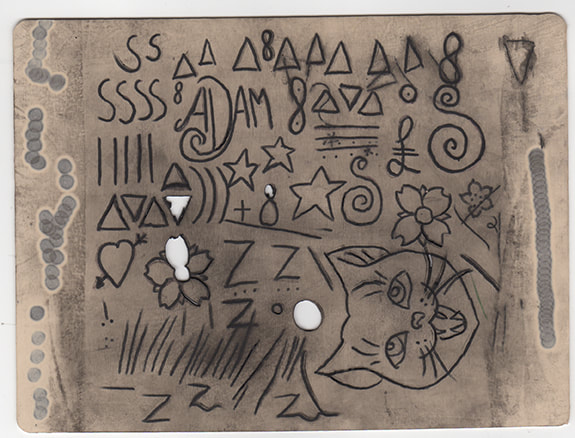
Distinct from other creative disciplines, skill refinement and development of tattooing practice typically requires the skin of someone external to the practitioner. Development of skills and ability is only possible through repetitive practice, however due to the inherently collaborative nature of tattooing, sourcing ‘materials’ for practice (other people) can be challenging.
In order to reduce this problem, I was advised to produce pre-drawn tattoo designs that may be offered on the Triplesix Studios social media pages, of the popular tattoo subject matter – the mandala. The rationale of this method is two-fold; despite Triplesix Studios custom operational system, multiple potential clients inquire within the store and ask to see ‘what designs we have’. It can be inferred that such clients are uncertain on what it is they hope to have tattooed, however still hope to obtain a tattoo. As a custom studio, books of pre-drawn designs (flash) are not kept or presented. The presentation of a pre-drawn image thus helps to encourage the indecisive client in design selection, following the typical format of advertising.
In addition to assisting in design selection, the mandala design may be created in a time-efficient way. In contrast to the traditional Tibetan sand mandala, which is produced by a collective of Buddhist monks over a period of days in a ceremonial context before being wiped away to symbolise the impermanence of all things (anicca) and renunciation of attachments (Toupence, 2007, p.12), many tattooists conventionally now utilise an iPad and software known as ‘Amaziograph’ to produce mandala designs with relative ease and speed. Having such pre-set designs that are also commonly requested aids in increasing the potential of obtaining clients to tattoo, and practice tattooing as a result.
Amaziograph is a drawing symmetry application that is designed to “support lessons for symmetry and tessellation and help students to discover the beautiful connection between mathematics and art” (Amaziograph Official Manual, 2018, p.2). Within Triplesix Studios and many other studios operating in a similar way, the software is used to create mandala designs. Utilising the mirrored kaleidoscope option of the software, pressure can be applied to the iPad screen (generally with the apple pencil) in which a grid format is presented, and a mark is made. The number of points on the grid may be chosen, and each mark is duplicated in perfect symmetry in accordance to the users’ preferences of repetition. This allows for the creation of an image that is directly transferrable as a stencil for tattooing.
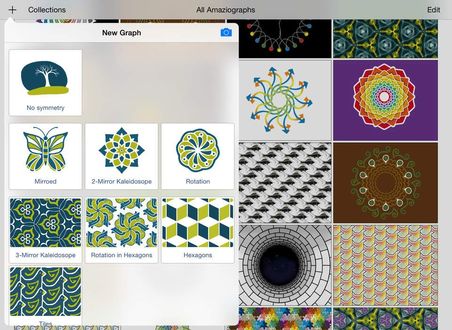
screenshot of Amaziograph application. Image Source: media.148apps.com
As a novice to producing creative works an iPad, I assumed the process would be difficult to grasp, however found it to be relatively intuitive. I was loaned an iPad from the studio founder, and produced a number of mandala designs that where set at the predetermined price of £50. A number of the designs where composed onto an a4 sheet and placed onto the studio countertop/shared on the studio social media.
In addition to designs being exclusively in black, I also utilised Adobe Photoshop to inform colour selection. This was performed by opening the saved jpg mandala files in Photoshop and selecting a portion of the design using the magic wand tool, before filling the selection with a variety of tonal gradients on a separate layer. For each layer of the mandala (which may be understood as each section that is linked in that it is the same mark repeated), a new Photoshop layer was created and the gradient of colours changed. Experimenting with colours on separate layers allowed for multiple versions of colour ways to be explored with ease, the layers could be duplicated and altered accordingly. This method of practice is not necessarily traditional, in that mandalas are often tattooed in black ink exclusively, and the technique employed is that which is more in keeping with my personal approach is design work in more conventional disciplines (illustration, graphics, etc.).
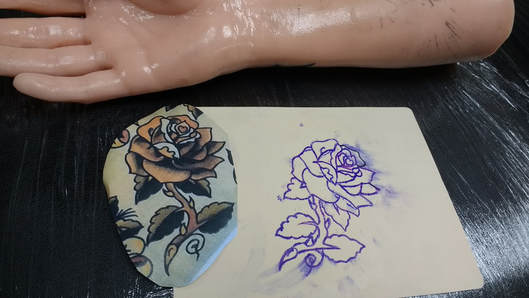
As I had expressed some scepticism in my ability to create mandala tattoos (due to having no experience in tattooing them), a desk staff member/colleague, Lesley, expressed an interest in having me utilise a space on her arm for my skill development. Lesley requested a colour pallet of brown, pink, and teal. This was attempted digitally (using the technique described above), however the outcome wasn’t deemed successful. In this instance, Lesley and I sat with a laptop and Photoshop software, exploring a variety of colour options, before committing to a pallet of teals, purples, and greens. The design was then printed and placed alongside the non-coloured image as a reference point for the colouring process.
In addition to designs being exclusively in black, I also utilised Adobe Photoshop to inform colour selection. This was performed by opening the saved jpg mandala files in Photoshop and selecting a portion of the design using the magic wand tool, before filling the selection with a variety of tonal gradients on a separate layer. For each layer of the mandala (which may be understood as each section that is linked in that it is the same mark repeated), a new Photoshop layer was created and the gradient of colours changed. Experimenting with colours on separate layers allowed for multiple versions of colour ways to be explored with ease, the layers could be duplicated and altered accordingly. This method of practice is not necessarily traditional, in that mandalas are often tattooed in black ink exclusively, and the technique employed is that which is more in keeping with my personal approach is design work in more conventional disciplines (illustration, graphics, etc.).
As I had expressed some scepticism in my ability to create mandala tattoos (due to having no experience in tattooing them), a desk staff member/colleague, Lesley, expressed an interest in having me utilise a space on her arm for my skill development. Lesley requested a colour pallet of brown, pink, and teal. This was attempted digitally (using the technique described above), however the outcome wasn’t deemed successful. In this instance, Lesley and I sat with a laptop and Photoshop software, exploring a variety of colour options, before committing to a pallet of teals, purples, and greens. The design was then printed and placed alongside the non-coloured image as a reference point for the colouring process.

original mandala (left) and coloured mandala used to inform tattooing process (right)
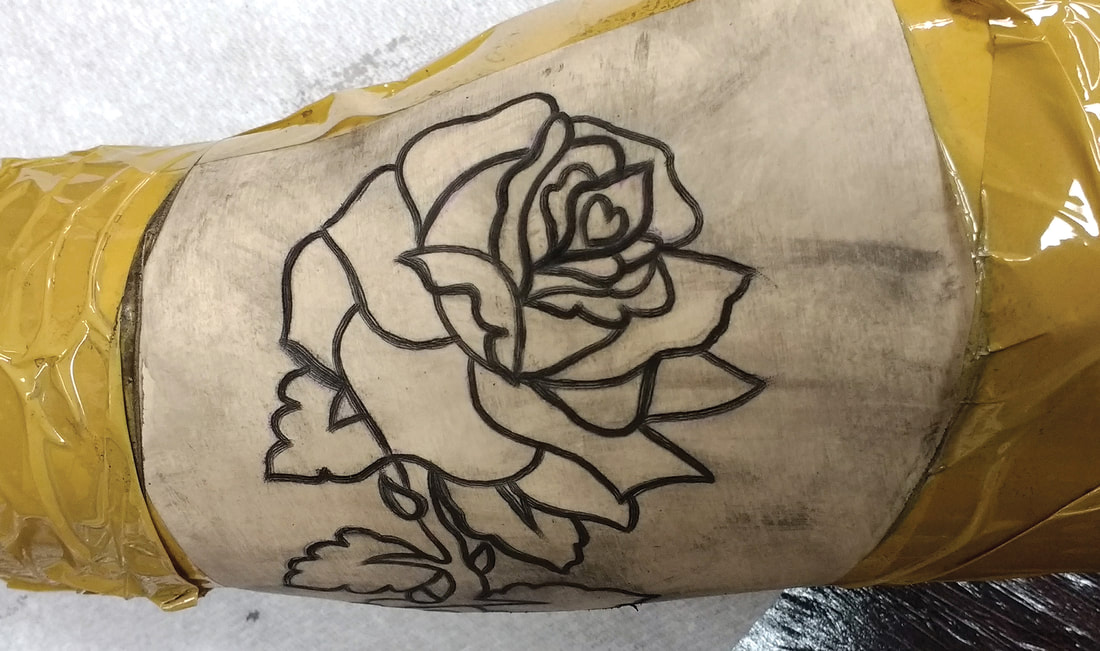
The placement of the design on the arm required 2 attempts. When applying stencils, the part of the body to be tattooed must be relaxed in such a way that is natural. This is in order to ensure that the way in which the tattoo will be viewed Is in accordance to a natural posture, rather than a posture of tension. The first stencil application appeared correct when the wrist was presented as an epidermal surface to which marks can be made upon (that is, when held outwards in a way that fully exposed the area of the body to be tattooed), however the stencil appeared off centre when viewed in a natural posture. The stencil was then reapplied in accordance to how it would be viewed when the arm was down by the side of the body, thus how the tattoo would be viewed in context. This consideration may be comparative to that of an illustrator designing a book cover, with the knowledge of titles, typography, and dimensions of the book in mind – while the illustration may appear successful when viewed out of context, when placed in context the same image may not work as affectively.
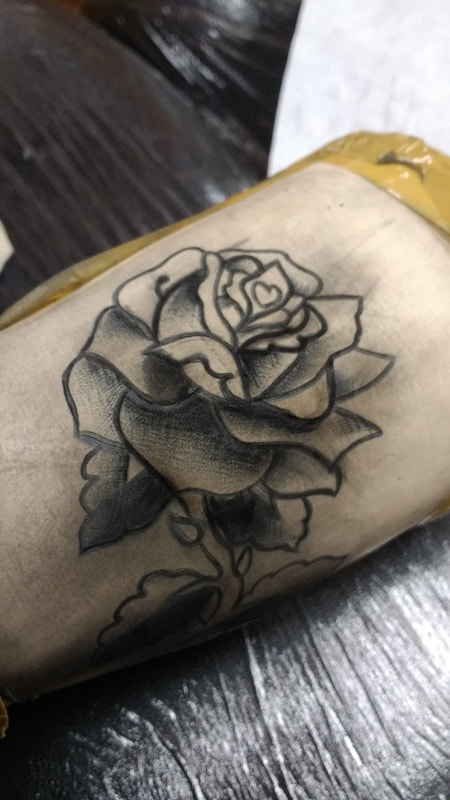
The application of the tattoo outline followed the conventional format, of creating the outline of the tattoo initially using black ink and following the purple coloured carbon stencil to increase the likelihood of an accurate translation from source image to tattoo. Once the outline and black ink of the design was tattooed, the colour application procedure began. Unlike the outline process in which the aim was to accurately reflect the source image, the colour option sheet that was created was more of an informative aid than instructional brief. The colours on the print may not always be representative of the ink selections available to the practitioner or the level of saturation of pigment, and thus merely guide the process.
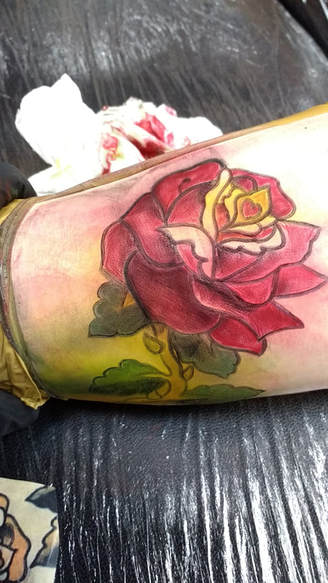
The role I had taken in performing each aspect of the tattoo felt like it had shifted from outline to colour. When conducting the outline, the importance was placed on craft-like conduct – that is, “… a way of doing things” that is supplemental to attaining the desired outcome (Adamson, 2007, p.6). When applying the colour, the process felt more in keeping with design training in that it required the activation of a creative capacity that wasn’t relevant to the outline process. As a requirement to fulfil the desired tattoo outcome, my role as a practitioner for this particular brief required a different skill set to tattoos created that are in keeping with the craft-like conduct alone. The finished tattoo serves as a documentation of the interplay between technology and creative practice, methods sourced from design (photoshop as an informative aid to conduct) and craft approaches to tattooing practice.
The application of the tattoo outline followed the conventional format, of creating the outline of the tattoo initially using black ink and following the purple coloured carbon stencil to increase the likelihood of an accurate translation from source image to tattoo. Once the outline and black ink of the design was tattooed, the colour application procedure began. Unlike the outline process in which the aim was to accurately reflect the source image, the colour option sheet that was created was more of an informative aid than instructional brief. The colours on the print may not always be representative of the ink selections available to the practitioner or the level of saturation of pigment, and thus merely guide the process.
The role I had taken in performing each aspect of the tattoo felt like it had shifted from outline to colour. When conducting the outline, the importance was placed on craft-like conduct – that is, “… a way of doing things” that is supplemental to attaining the desired outcome (Adamson, 2007, p.6). When applying the colour, the process felt more in keeping with design training in that it required the activation of a creative capacity that wasn’t relevant to the outline process. As a requirement to fulfil the desired tattoo outcome, my role as a practitioner for this particular brief required a different skill set to tattoos created that are in keeping with the craft-like conduct alone. The finished tattoo serves as a documentation of the interplay between technology and creative practice, methods sourced from design (photoshop as an informative aid to conduct) and craft approaches to tattooing practice.
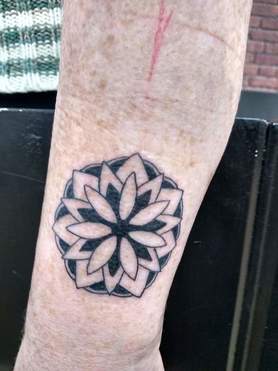
outlined and shaded mandala
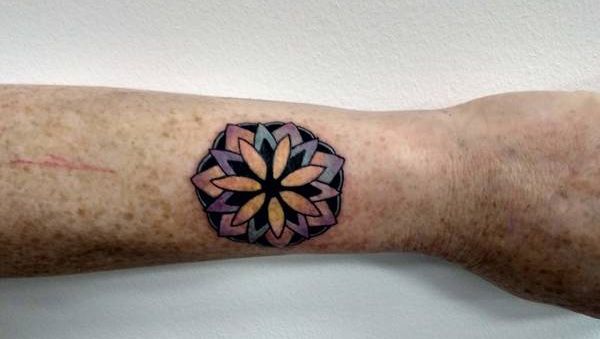
mandala with addition of colour

translation from source image to tattoo
Bibliography
Adamson, G. (2007) Thinking Through Craft. 1st Edition. London ; New York: Berg Publishers.
Amaziograph Official Manual (2018) ‘Amaziograph Official Manual’. Amaziograph. Available at: http://www.amaziograph.com/manual/AmaziographUserManual.pdf (Accessed: 14 November 2018).
Toupence, J. (2007) ‘Tibetan Sand Mandala.’, Skipping Stones, 19(3), pp. 12–12.
 RSS Feed
